A Blog Post Template That’ll Drive More Traffic to Your Site

You probably know you can drive traffic with blog posts.
Whoop-dee-doo...
But actually, you can drive a LOT more than you probably expect.
In the last 6 months, we’ve seen 238,033 visits to our site, most of that being organic traffic from search.

For you, that might be a lot (“WOW”). But it depends on your niche and where you’re at in your journey.
We’re proud of it, and the great team who’s helping me publish quality content (4x per week now), and the 1000’s of leads bringing in (which is kind of the point of getting traffic, right?).
But we’re also proud of the great system that earns us these (growing) traffic results...
I want to share with you today a critical piece of that system:
Our proven 6-point blog post template.
By using this template in your content marketing efforts, you can go from generating 1–2 inbound leads per month, to literally generating 100-200 leads.
With this easy-to-follow blog post formula, a lot of the guesswork is eliminated and you can simply fill in each section.
(BTW, you should grab the PDF download since it includes the most detailed version of the template).
Here’s what we’ll go over:
- Each of the 6 sections of our proven-to-convert blog post template, step by step.
- How to apply this simple blog post outline to get progressively bigger results for your website funnel.
- And content marketing best practices that will help you craft better articles people will want to read.
Check our proven blog post template. It starts with...
In a rush? Want to download this article as a PDF so you can easily take action on it later? Click here to download this article as a PDF guide.

Blog Post Template Section # 1: Finding the Right Target Keywords That Will Rank You #1 in Search Engines
At this point, you have already picked your topic and know who your target audience is.
Now it’s time to choose what your target SEO keywords will be.
There are a lot of valuable and practical SEO tips for bloggers you can follow but in this step you’ll focus on targeting your keywords.
And 67% of marketers report that SEO is the most effective method according to Smart Insights.
And I know you might be wondering...
“But when we write copy in general, the SEO copy editing comes at the end of the process… why does it come before we write the article here?”
That may be true, but we’re doing it first here because your blog post title is going to determine about 50% of how successful your article will be from 3 standpoints:
- Likely to share or link to.
- Likely to gain relevant search engine traffic.
- Likely to compel people to click to read.
And the second point’s success depends on a combination of a few SEO factors:
- How much competition is there for the keyword you picked? (The lower the better)
- Your on-site SEO (i.e., does your title tag in the HTML of the page have the keywords you’re trying to rank for in search engines?)
- How “great” is your content that Google naturally wants to put you on the first page of search results and other people want to link to it?
You see, 67% of companies use organic traffic to measure their content success according to HubSpot.
But to make sure people actually read and share your blog posts, choosing your keywords strategically is the first step.
To do so, you can use tools like:
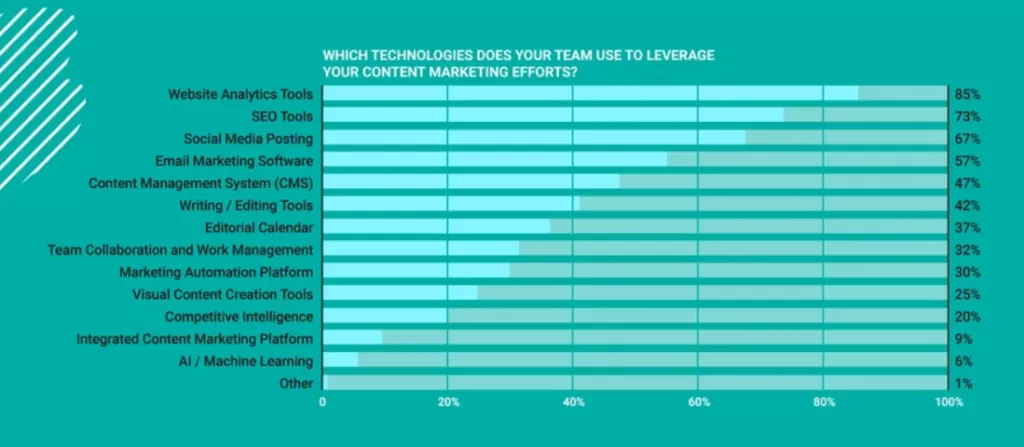
73% of people use SEO tools when creating content that generates quality leads according to SEMrush.
The keywords you pick to target for your blog post don’t need to have buyer intent. Instead, they should have research intent instead.
Because although you’re looking to convert your blog traffic into sales, you’re not looking to sell visitors yet.
Preferably, choose the target keywords that don’t have significant search volume (at least 300 searches per month).
Focus on ones that are most relevant directly or indirectly to your business.
And focus on keywords that are 3-5 words total.
Everything’s clear so far, right?
Let’s continue then...
Now how do you rank your blog post #1 for so many keywords?
Well, those best practices mentioned above will help you start ranking easier.
We follow those same best practices and that has made us rank #1 for a number of different articles.
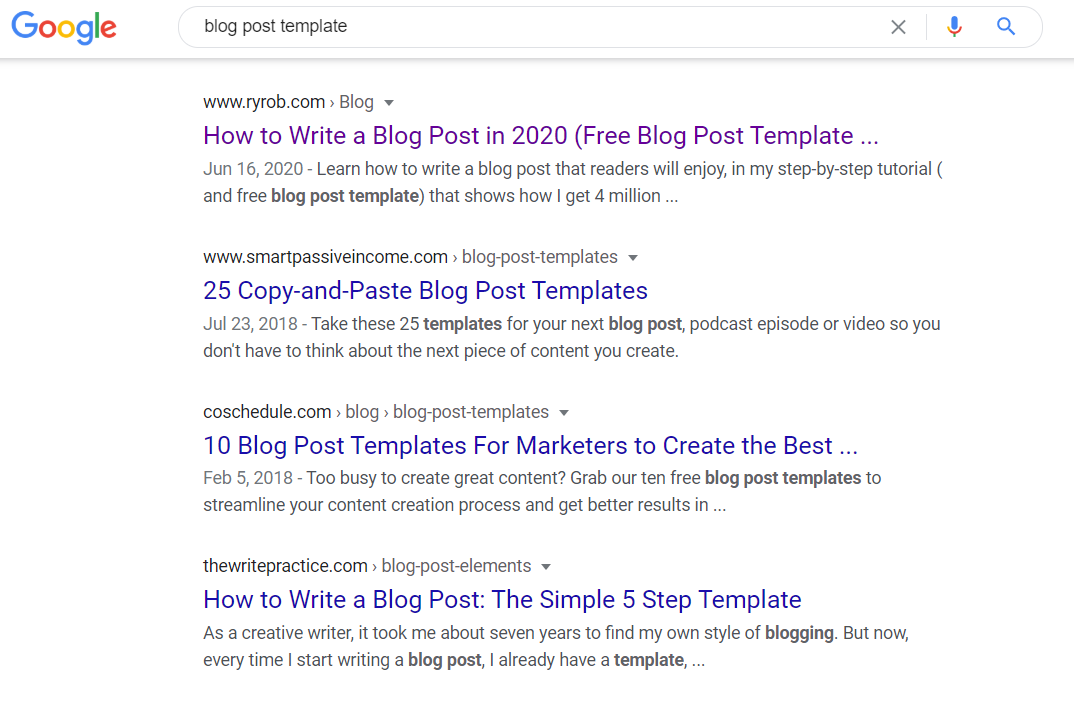
Here we are at the top for our “What Are High-Ticket Products And Services & How You Can Sell Yours [5 Examples Of High-Ticket Sales Funnels Proven To Convert Included]” article.
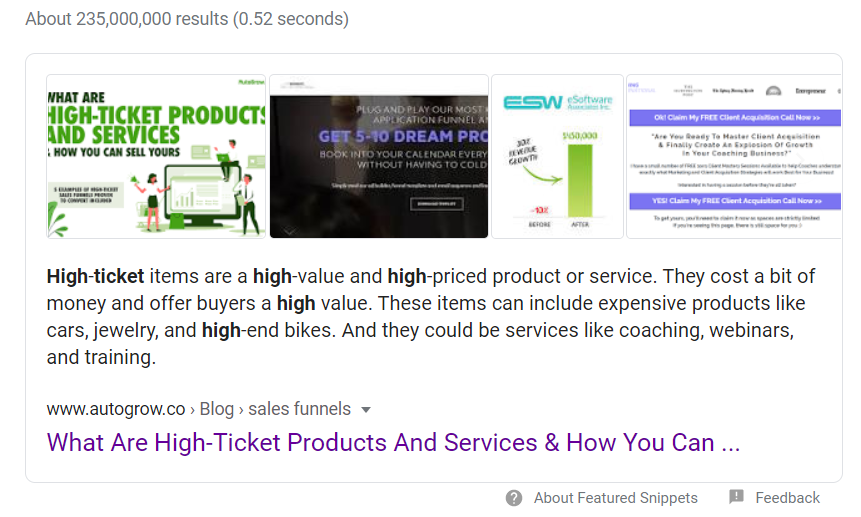
And this one is for our “Looking to Sell Your Coaching Services? The FREE Coaching Funnel Template You Need Is Here” article.

And remember, from Google’s point of view, it is always trying to give its users the best possible results based on what they’re searching for.
And if Google determines that your content best answers the needs of the searcher, you’ll move up in the rankings quickly.
So just by publishing a high-quality article that contains the keywords in its title tag, you might instantly rank in the top 30 results.
Now, let’s move on to incorporating your keywords into your blog post titles and writing the headline 20 times.
Say what!?
I’ll explain it to you in the next section.
Blog Post Template Section #2: Eye-Catching Title That Will Practically Force the Reader to Click
By the end of this step, you’ll have selected the title for your first blog post.
Once you have selected your blog post type, you’re going to write down 20 different variations of the title.

For this, you can search for the top 4-6 Google search results to find some inspiration for writing your titles.
In each variation, you’ll include your keywords for Google ranking purposes and emojis to add some personality to it.
Also, considering you already know the different blog post types that actually get traffic, it’s time to incorporate the most commonly used words in your titles.
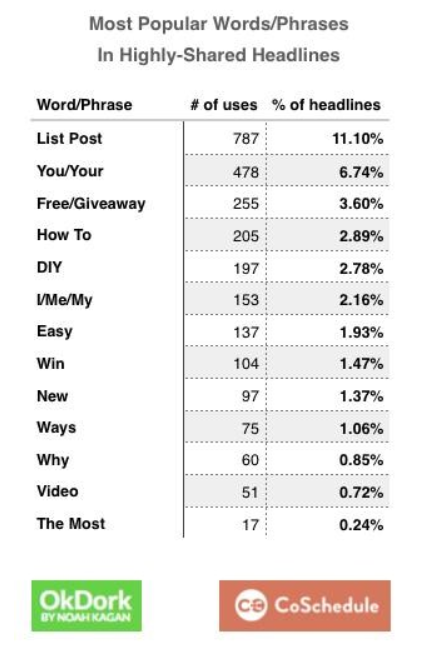
And as you can see in the data below, these are the most common words used in highly-shared articles according to CoSchedule…
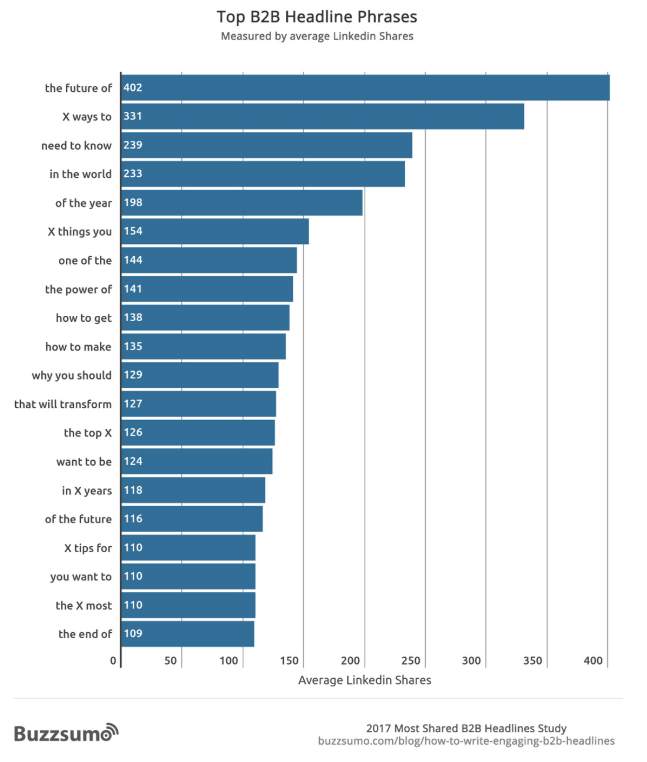
And here are the top 10 B2B headline phrases analyzed by Buzzsumo that you can use for inspiration when coming up with titles.
List post articles are the best performing pieces of content I’ve created in my own marketing tests as well.
And making your blog post title 6-8 words can increase your CTR by 21% according to OptinMonster.
We actually keep our blog post titles to 60 characters maximum.
8 out of 10 people will read your blog post title but only 2 out of 10 will read the rest according to Copyblogger.
So it must be eye-catching.
Also, notice that the second most popular headline word is “You/Your.”
In other words, a headline that is positioned to be focused on the reader and his/her needs is more likely to produce engagement (i.e., clicking, reading, linking, sharing).
Here’s another great tactic I want you to use.
Great blog post titles create an “information gap.”
Appealing to an information gap is a great way to pique curiosity in the reader’s mind.
It’s specific enough to draw him in, but something is left out so he wants to click to find out more.
This simply makes it harder for your reader to resist clicking.
But this tactic should not be overused because otherwise, readers will become immune and annoyed by it.
This is a powerful tactic because it triggers curiosity in your readers.
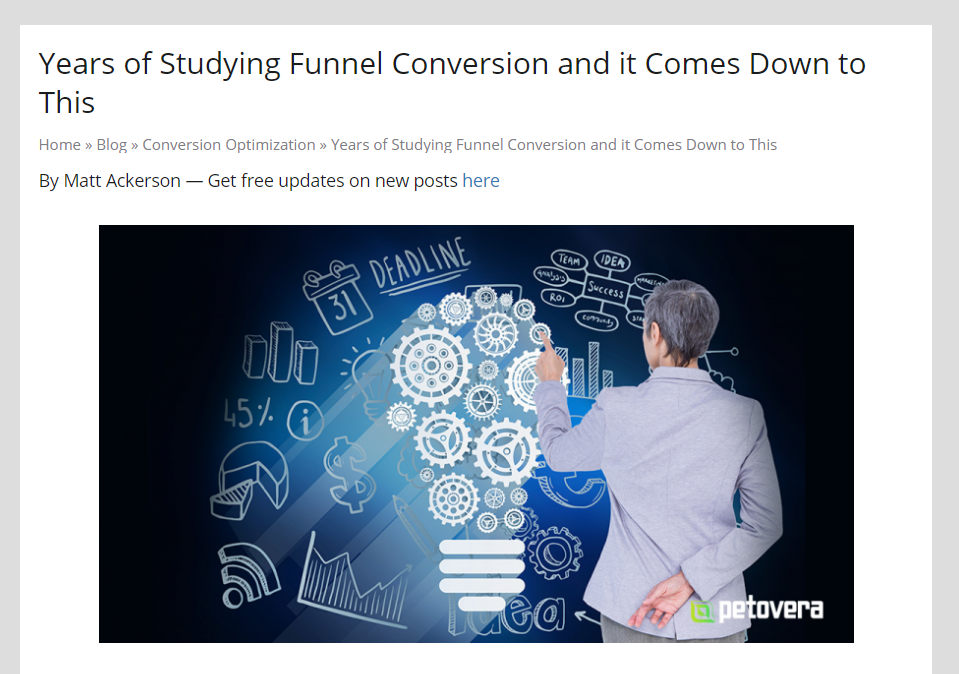
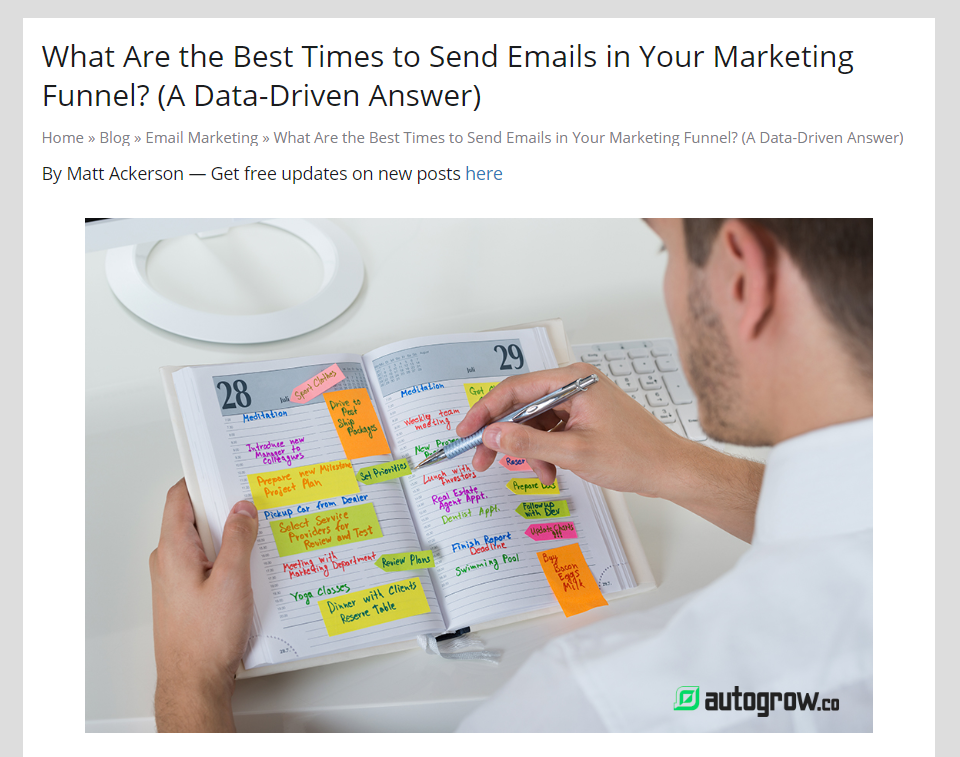
See the example below?
It makes you wonder what “This” is all about.
This tactic helps maximize the rate at which people end up clicking back to your website to find out the answer to the question your blog post title poses.
Now, when you write your 20 different blog post titles, some of them will be really dumb.
But that’s ok because this process will help you to ultimately strengthen the final title you’ll end up with. Then people will be more likely to click, share, and consume your content.
So writing 20 different variations of your blog titles is worth it.
And in this process, don’t be afraid of being controversial.
Actually, highly clickable blog post titles are sometimes contentious or controversial.
In fact, according to Harvard Business Review, slightly controversial articles get more comments than completely neutral ones.
Because they produce a strong emotional reaction in the reader.

For analyzing your 20 different blog post titles, use Advanced Marketing Institute or CoSchedule.


These are useful tools that analyze your titles’ performances.
They score the emotional level of each title and show you potential areas of improvement.

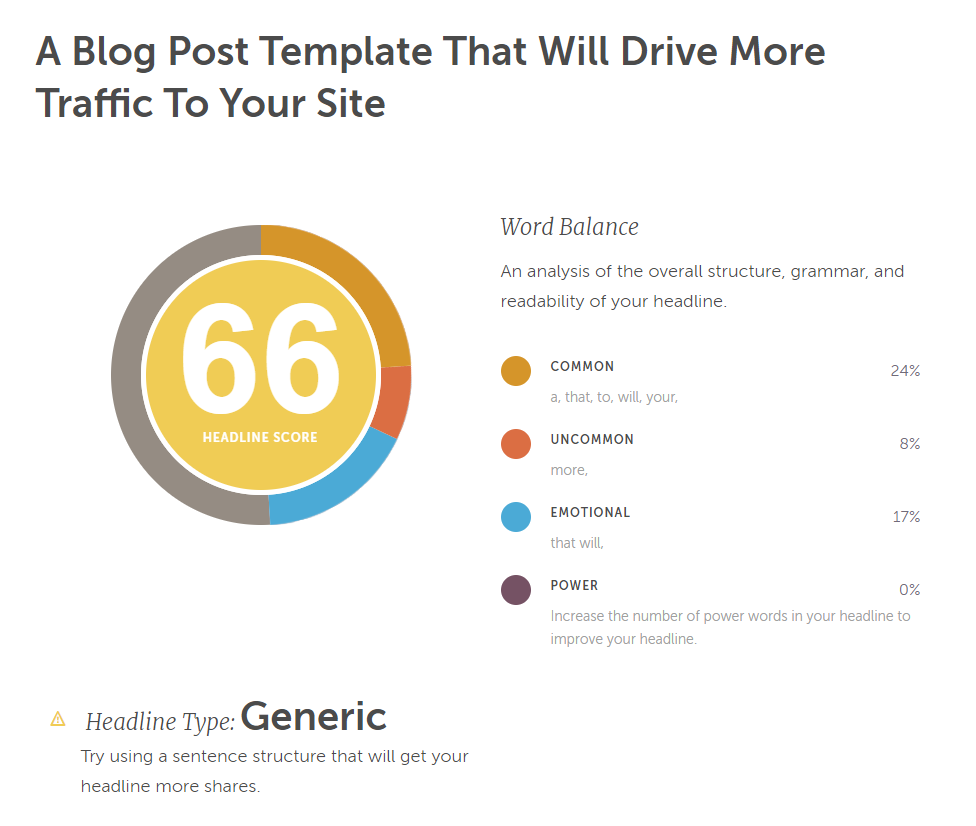
They basically show you a representation of how, on an emotional level, you’re able to reach readers with your blog post titles.
Phew!
That was intense (writing 20 titles for your post) but it didn’t take too long.
Now you’ve got some amazing blog post titles to choose from!
Next it’s time for you to choose the 4 variations that got the highest score in the headline analyzer tool you used.
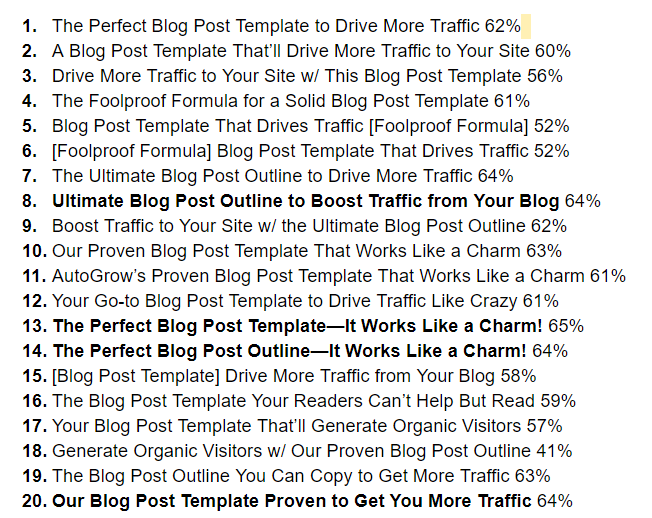
Then, see if you can improve on those, and finally, select the one winning title idea.
Want to follow our 6-Point Proven Blog Post Template to Drive Website Traffic? Click here to download the template now.
Blog Post Template Section #3: Enticing Introduction That Will Hook Your Readers From the Start—Here’s the Secret Formula…
This is one of the most important parts of your blog post.
Because this opening section will entice people to keep reading or to just leave your blog.
If they leave your blog, they probably won’t come back.
But if you get them to keep reading, then you’ll eventually convert them.
Because you should be thinking about how to get your blog visitors to take action beyond having them read your article.
Their journey through your blog shouldn’t end there.
For instance, with your introduction you will catch people’s attention and make them want to come more often to your site.
And there’s no better way to do that than using the ASAPP formula.
Let me break down the formula for you…
A — Agreeable Statement: This reinforces what your readers may (or may not) know about the topic they will read. And a great way to do so is by adding some credible statistics. Start with a short, relatable, universal question or statement.
Example: “Doesn’t it seem like you’re always in a race against your business to grow sales?”
Or

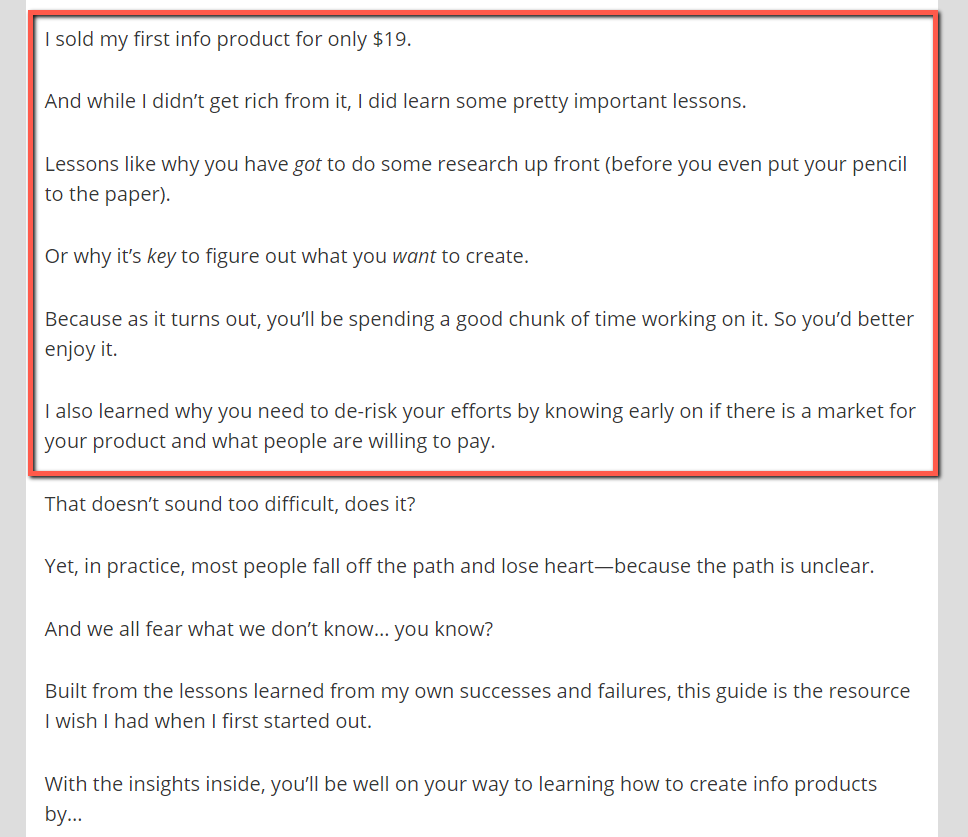
S — Story: People love listening to stories. That’s the power of storytelling. In fact, LinkedIn’s B2B Content Marketing Report states that 57% of what makes content compelling is storytelling.
A great story that narrates yours or someone else’s anecdotes will hook readers. It could be a case study (people love knowing how someone achieved a specific goal).
But ideally, tell a personal story, from your perspective, or you can always “steal” someone else’s story.
The goal in telling a story is to 1) get the reader to keep reading and to (2) present the problem/opportunity your article is about to address.
In fact, Alex Turnbell, founder of GrooveHQ.com, tested writing blog posts with and without stories. People who saw the blog post with the story were 300% more likely to scroll (read) all the way to the bottom. And the time spent on the page was 5 times higher.

Example: “My business partner [something something].”
Or
A — Anecdote: This could be optional. But it can do wonders for your readers if you combine both a story and an anecdote. The idea here is to create an open loop. An open loop is a concept that, in the telling of stories, drives our brains to naturally want to seek out some sort of conclusion. And you want your readers’ brains to do exactly that.
P — Promise: This is the promise of what the reader will get after reading your blog post or article. There has got to be a promise in order for people to feel like they will gain something. For instance, tell them the top benefit(s) they will get from reading (sell them on reading!).

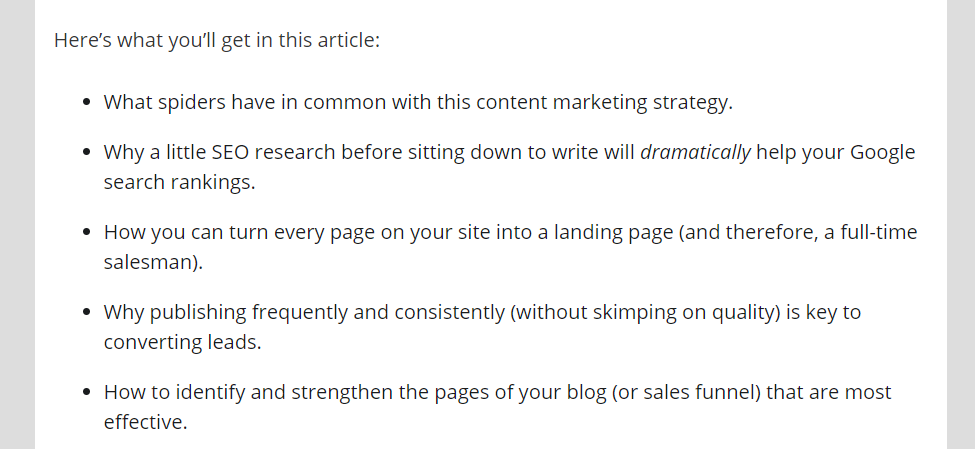
P — Preview: Give an enticing (some details, but keep them wanting more) sneak peak. Readers want to know exactly what to expect from reading your blog post. For this, use bullet points so readers can easily digest these main points.
The bottom line is, your introduction will set the stage for the problem you’ll be talking about in your post. And of course, you’ll give your readers the right tools and information to help them solve it along your blog post.
You won’t be providing the solutions yet. You’ll just tell your readers how you can help them solve whatever problem it is they’re experiencing.
And best of all, this section of your blog post outline template can be applied to any industry or any product or service you’re selling.
Blog Post Template Section #4: Clear & Easily Scannable Body Section That Adds Nothing But Value to Your Readers & Answers Their Questions
Relevant content that is useful to your target market is simply the fuel that goes into your engine.
Content fuels your sales funnel’s engine.
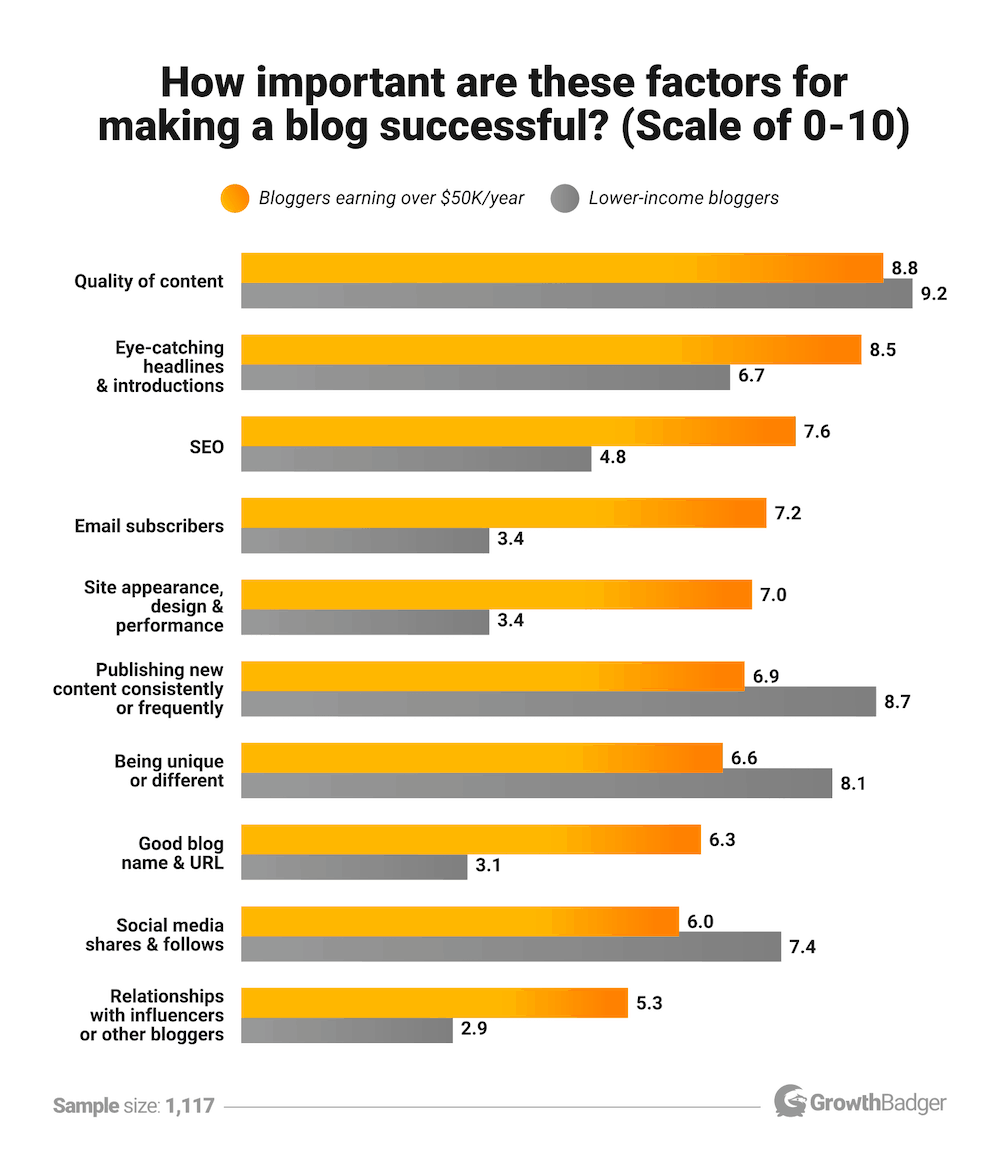
Quality of content is rated the #1 most important success factor among all bloggers according to GrowthBadger.
The body of your blog post template explains the solutions to the problem you set up in the introduction.
And now that you've identified a problem for your reader, they're ready to finally know the solution to it.
Or if your blog post title was a question, it’s time to give your audience the answer.
The Law of Alignment (one of the 11 Laws of Sales Funnel Physics) is critical here.
This law states that people will convert more often on offers that are aligned with their needs and problems.
This means that you can’t state a question on your blog post title, and then never answer it on your body.
This will make readers leave your blog and, probably, never come back again.
This section can be written in paragraphs but make them short and use crisp sentences (1-2 maximum per paragraph).
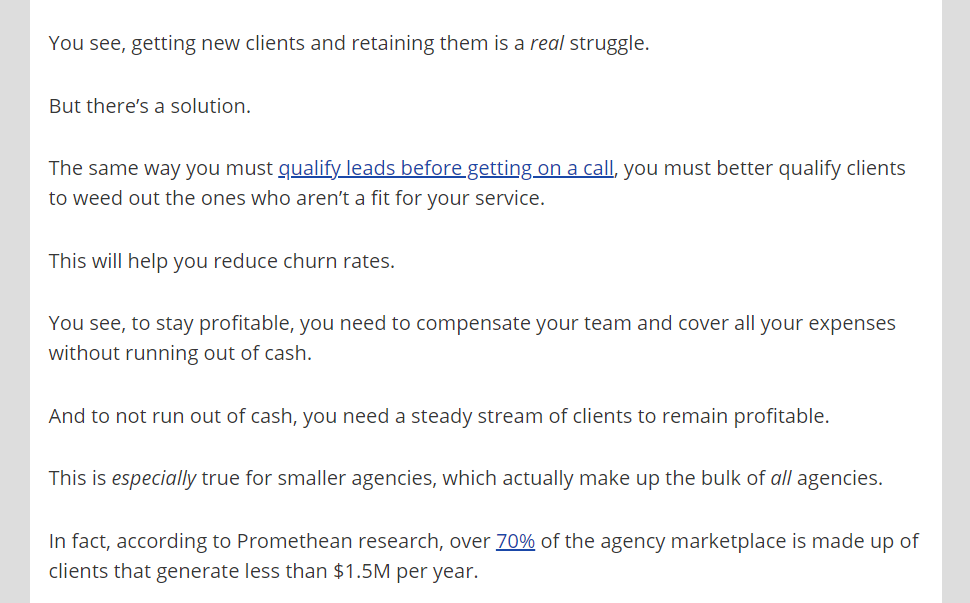
According to Nielsen Group, a study found that a sample website scored 58% higher in measured usability when the content was written concisely. When it was scannable, it scored 47% higher.

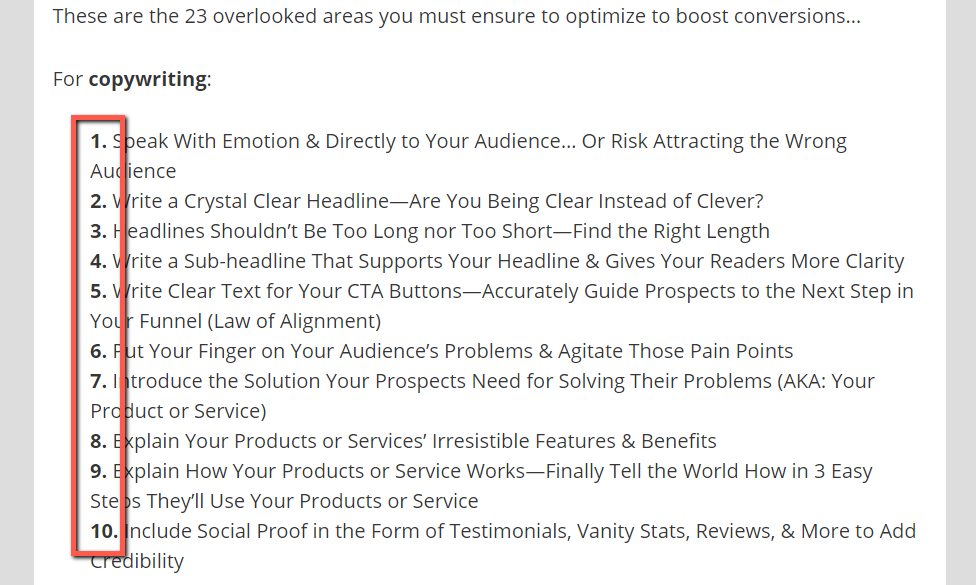
Use bullet points, numbered lists, headings, subheadings, or all of these too to help break up the structure.

And to keep people reading, raise questions in earlier sections that will be answered later on (open loops) in the reader’s mind.
One recommendation I want to give you though is when you start out with your blog post outline, focus first on writing How-to or List-based articles.

These types of articles are really easy to craft and will naturally get you the best return for your effort.
That being said, the body of your blog post template should be divided up into clearly defined sections or a numbered list.
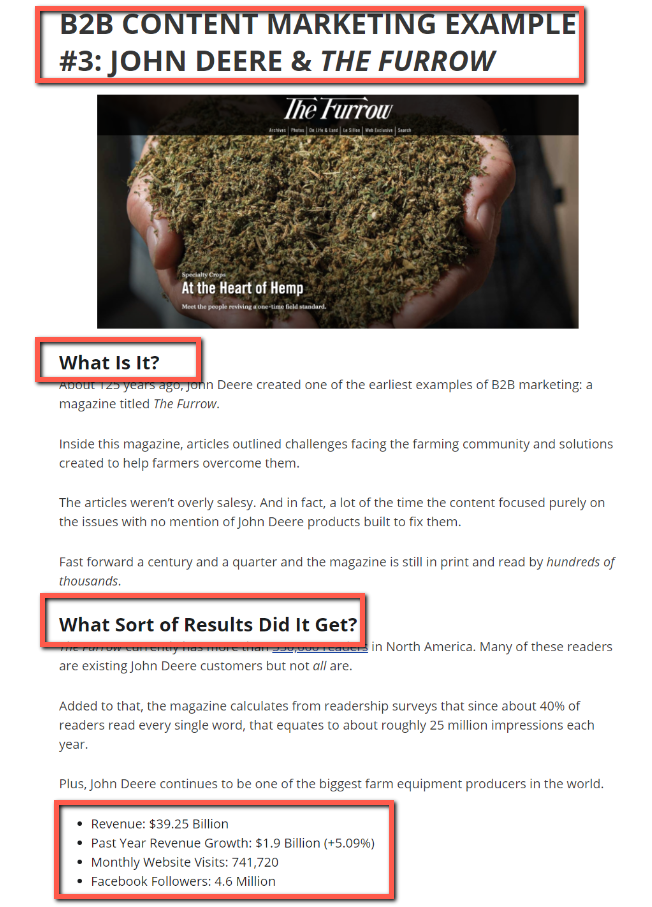
The headline for each step or numbered list item should stand out, making the article easier to read and skim.
Because 73% of people skim blog posts while 27% consume them thoroughly according to HubSpot.
From an SEO/HTML perspective, put all headlines in an <h2> tag and just one in an <h1> tag too.
And of course, each section of your blog post template should follow a consistent format.
For example:
- Pictures, images, videos, or screenshots showing an example you’re referencing to, and a customized header image at the top of your article with the title of your blog post.
- Source of the image.
- Explanation of what the example is and how to model it.
- Specific results achieved with that example.
- Address common questions your readers may have.
- Add content upgrade boxes.
Here’s a short template of how we commonly structure those examples-based sections.
[INSERT SUBHEADLINE EXAMPLE HERE]
[INSERT IMAGE OR LOGO OF THE COMPANY FEATURED]
What is it?
Answer
What sort of results did it get?
Answer
How do I execute to _______?
Answer
How long does it take to implement?
Answer
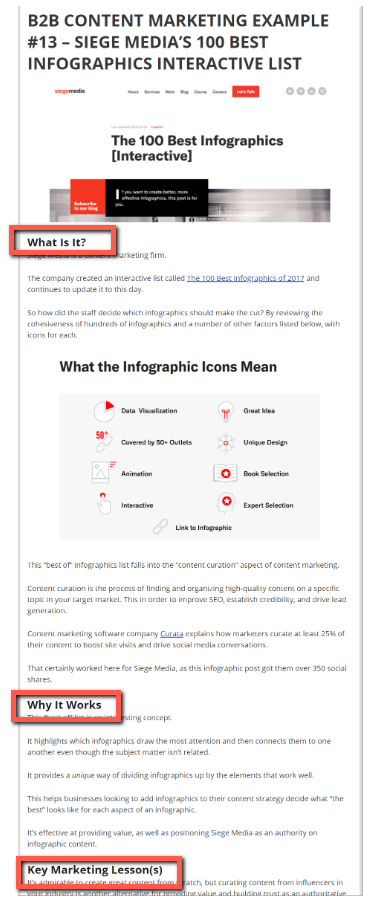
See?
That’s our template for examples-based sections in a nutshell.
In the body of your blog post template, don’t be shy about using bullet points and short, numbered lists within each section or list item.
This further helps to break up the flow of the article visually, making it easier to skim and scan over.
Plus, it makes it look well-thought out and high-value.
And this helps to increase the rate of organic shares.
Something else that’s important to consider is each point should transition to the next section and have a short preview of the previous section.

And at last but not least, all claims you make should be supported by research from credible AND original sources.
This will help improve the overall perceived value and credibility of the article while also positioning you as an authority.
Blog Post Template Section #5: Wrap Up By Restating the Problem Your Readers Want to Solve in Your Conclusion
Most people neglect the importance of a conclusion.
The conclusion wraps up your blog post with a brief statement that's reflective of the problem you just solved for your audience.
This section is specifically important because you want to restate the problem your readers experience and the opportunity (what the reader will gain by using what you’ve taught him or her).
For this section, include a bullet-pointed or numbered list reviewing each point or step you walked your readers through.

This is good because people often like to skip to the end of the article to the conclusion to decide if they want to read the entire article.
Or sometimes people just want to skim through the blog post and see the “summarized” version of the article in the conclusion.
Having bullet points in the conclusion is also helpful for people who have read the full blog post because in psychology, we know that repetition increases the brain’s ability to recall information.
And the more information your reader can recall later, the bigger the potential impact it can have on their lives or businesses.
And to end your conclusion, ask your readers a question.

You throw some questions at the end because you want to push the reader to leave a comment, reach out to you, share some feedback, or simply continue the discussion below.
And therefore, make them interested in reading your other articles too.
The conclusion should be short. BUT, make sure you give your readers a clear CTA so you can keep moving them down your funnel and eventually convert them.
This is the formula we follow for the conclusion of our articles:
Now tell me something, do you have any questions about [TOPIC]?
Have you tried any of the [EXAMPLES, TACTICS, STRATEGIES, STEPS] above?
Let me know in the comments below.
Keep Growin’, stay focused.
[SIGN OFF]
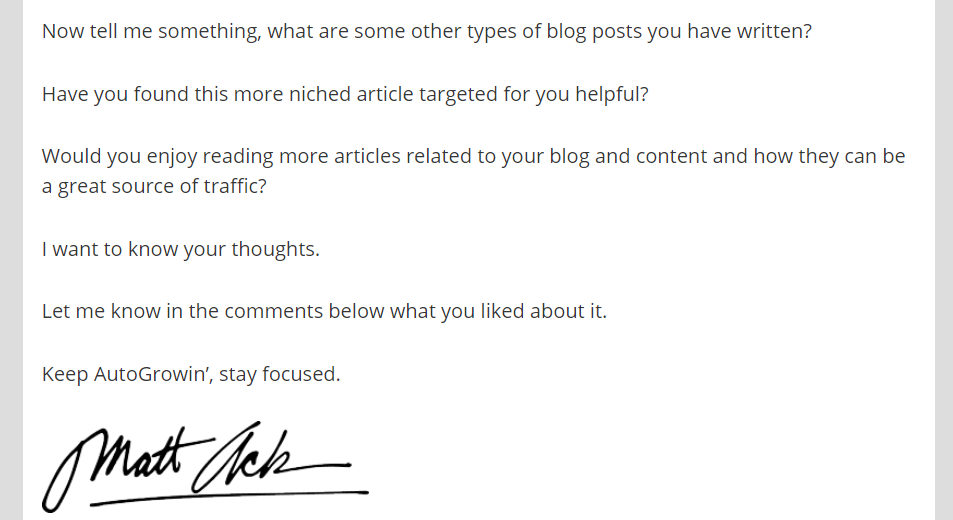
See how simple it is to “fill out” your conclusion?
If you follow all the steps of this awesome blog post template, you’ll start generating leads with your blog right away.
Blog Post Template Section #6: Craft a Balanced & Simple Design
Humans are very visual creatures.
In fact, more than 50% of our brains are used to process visual information according to the University of Rochester.
That’s why you need to provide a great visual experience to your readers.
Your blog post needs to have a design that captures your readers’ eyes.
It doesn’t have to be busy or complicated. It could be very minimalist and simple like this…

But you have to provide meaningful value to your readers when they read each of your blog posts.
And for this, make sure you:
- Use proper formatting: The use of headers and other formatting tags provide an important visual structure for your blog post and makes it much easier to read or skim through it.
- Optimize your layout: Balance the elements in your blog post page. If you’re adding opt-in forms, then add them to your sidebar. Use colors that stand out and contrast. Especially for the text..
- Increase your font size: While small text can look good sometimes, you’re looking for your readers to read the content. And for that, you must have a comfortable size of the text for your eyes. If the text is difficult to read, then your readers won’t read it. Larger font sizes can simply increase reading speed and comprehension.
- Use margins and spacing: White space is important here. Your margins, the spaces between content and page edges, must balance your design and make your content easier to consume. For instance, include a lot of white space around blocks of texts to make them more readable and less visually uncomfortable for your readers.
Conclusion
Want to follow our 6-Point Proven Blog Post Template to Drive Website Traffic? Click here to download the template now.
There you go. Here’s your perfect blog post outline so you can start writing articles and driving traffic like crazy.
In this article, I showed you the exact same blog post template we use at Growbo and that helped us double our website traffic in 30 days.
I go in much deeper about this and our Rocket Content Formula in our 6-Figure Sales Funnel Training by the way.
To review, here are the most important elements in your blog post outline:
- Start your introduction with a short, relatable, conversational question or statement.
- Tell a story to introduce the problem you’ll be solving for your readers.
- Transition the story into revealing the benefits your readers will get and a preview of how this article will help them.
- In the body, each list item or step (in the case of how-to articles) should have a number and be bolded to stand out.
- Use a consistent format for each section.
- Each section in the list should flow seamlessly into and preview the next one.
- You need to constantly sell the reader on why they should keep reading.
- Raise questions in earlier sections that will be answered later on (open loops) in the reader’s mind.
- In the conclusion, review the problem for readers who skim through the article.
- Use indented bullet points to review each of the key points in the article (see what I did here?)
- And end it with a question to encourage readers to leave comments or to start a discussion.
Over time, you can tweak this blog post template to better fit your own style, but first get comfortable with practicing the process and iterating on and on.
Now tell me something, when writing your blog posts, do you follow a template like this?
Or do you follow a less structural outline?
Is there an important part of this blog post template you think is worth including?
Let me know in the comments below.
Keep Growin’, stay focused.


